Getting Started with MiniForge at REPACSS
Introduction
This guide covers setting up and using MiniForge (a minimal conda distribution) for data science applications on REPACSS.
This covers user-installed Python-based data science, machine learning, and scientific computing packages - requires local installation. For system-provided HPC applications, see Module System.
Why Use MiniForge
MiniForge offers several advantages over traditional Anaconda distributions:
- Community-Centric: Uses conda-forge as the default source of packages, providing access to the latest community-maintained packages.
- No Default Channel Conflicts: Avoids Anaconda's proprietary defaults channel, eliminating potential licensing issues.
- Minimal Footprint: Lets you install only what you need, keeping your environment clean and efficient.
- Fast and Reliable: Includes Mamba (C++ implementation) for dramatically faster package resolution compared to standard conda.
- Licensing Clarity: No commercial restrictions or licensing concerns for research and commercial use.
🚀 Quick Start
If you just want to get started quickly:
- Install MiniForge: See Installing MiniForge section
- Create an environment:
conda create -n myenv python=3.11 - Activate it:
conda activate myenv - Install packages:
conda install numpy scipy matplotlib - Start coding:
python -c "import numpy; print('Success!')"
Overview of Conda Ecosystem
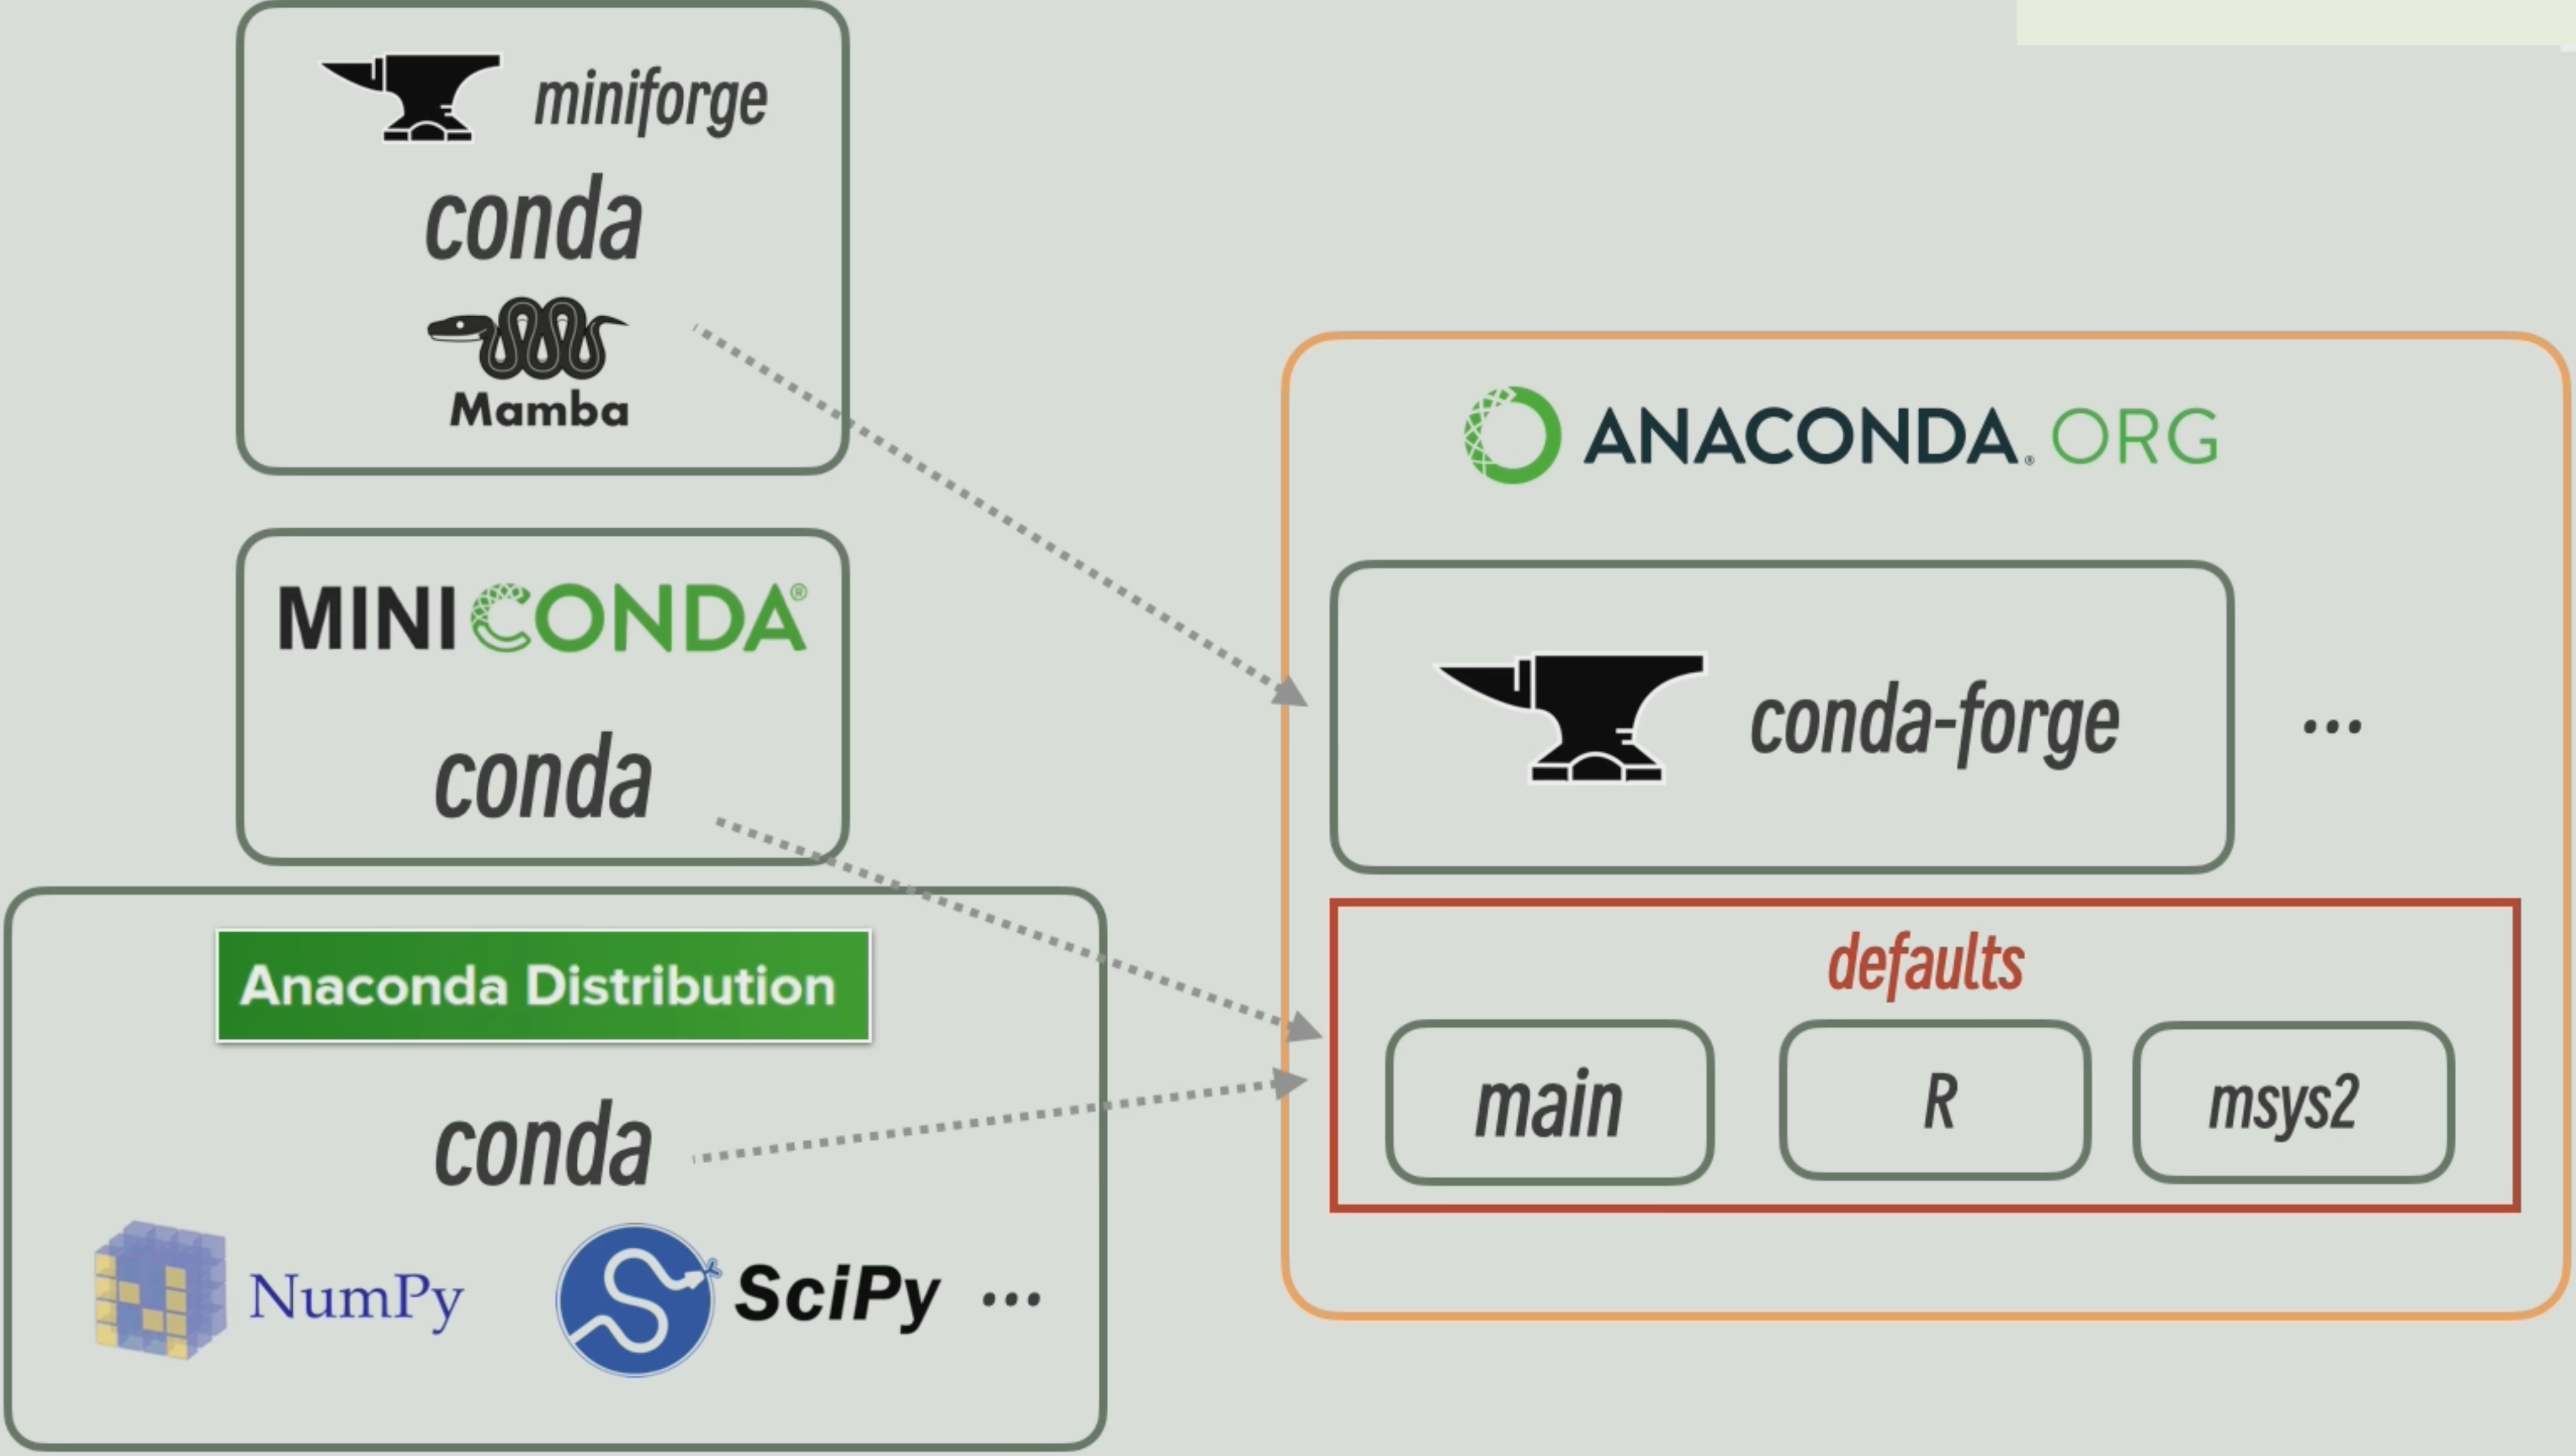
Figure source: Bilibili Video - Conda Ecosystem Overview
The conda ecosystem consists of different distributions and package channels that work together to provide package management capabilities:
Conda Distributions
- Conda: The core cross-platform command-line tool for managing packages and environments, used by all distributions.
- Anaconda Distribution: A commercial distribution that includes Conda and many preinstalled data science packages (NumPy, SciPy, etc.). By default, it connects to Anaconda's proprietary "defaults" channel.
- Miniconda: A minimal Anaconda installer with basic tools. By default, it connects to Anaconda's "defaults" channel but can be configured to use other channels like conda-forge.
- MiniForge: A minimal installer with only conda-forge preconfigured and no proprietary channels. Includes Mamba as a drop-in replacement for conda - a C++ implementation that dramatically increases package resolution speed compared to the standard conda solver.
Package Channels
- conda-forge: A community-maintained channel providing the latest packages with open licensing. Used as the default by MiniForge and recommended for Miniconda.
- Anaconda defaults: The default commercial channel for Anaconda and Miniconda, including "main", "R", and "msys2" sub-channels.
Removing Previous Conda Installations
If you previously installed Anaconda or Miniconda, we recommend removing them to avoid conflicts.
Check for existing Conda
conda --version
Locate old installations
ls -al | grep conda
Remove directories
find . -maxdepth 1 -name '*conda*' -exec rm -ir {} +
find . -maxdepth 1 -name 'Miniforge*' -exec rm -ir {} +
find . -maxdepth 1 -name 'Mambaforge*' -exec rm -ir {} +
Clean .bashrc
Remove any conda initialization lines and sign out and back in.
Installing MiniForge
Download and run installer
wget https://github.com/conda-forge/miniforge/releases/latest/download/Miniforge3-$(uname)-$(uname -m).sh
bash Miniforge3-$(uname)-$(uname -m).sh
Accept the license agreement and install to the default directory (e.g., $HOME/miniforge3).
Initialize and prevent auto-activation
source ~/.bashrc
conda config --set auto_activate_base false
Confirm installation
which conda
conda --version
Adding Channels (Optional)
By default, MiniForge uses conda-forge. Additional channels can be added if needed.
Set strict channel priority
conda config --set channel_priority strict
Optional: Add Bioconda (for bioinformatics)
conda config --add channels bioconda
Creating Virtual Environments
Create a new environment
conda create -n <env_name> python=3.11 numpy scipy matplotlib
Activate the environment
conda activate <env_name>
List environments
conda env list
Managing and Removing Environments
Deactivate the current environment
conda deactivate
Remove an environment
conda env remove --name <env_name>
📦 Installing Packages with Pip
When a package is unavailable via conda, you can use pip within an activated conda environment:
# Activate your conda environment first
conda activate myenv

# Install packages with pip
pip install somepackage

# Install from requirements.txt
pip install -r requirements.txt
Important
Always use pip inside an activated conda environment to prevent conflicts with system Python.
Optimizing Conda Initialization
Avoid installing all packages in the base environment. Create small, purpose-specific environments for each project.
Prevent base from activating on login
conda config --set auto_activate_base false
Check the configuration
conda config --show | grep auto_activate_base
Best Practices
- Keep the
baseenvironment minimal - Create separate environments for different projects
- Use descriptive environment names
- Document your environment dependencies
Notes on Anaconda Licensing
Anaconda, Inc. enforces licensing terms on their default channels and tools. Usage in commercial or research contexts may require a paid license.
To avoid licensing complications and ensure access to current packages, we recommend avoiding the Anaconda defaults and using MiniForge + conda-forge.
Warning
REPACSS does not cover licensing costs related to Anaconda. Users are responsible for any commercial usage compliance.
For more details, see: Anaconda Terms of Service
📚 Related Documentation
- Running Jupyter Notebook - Interactive Python development with Jupyter
- Module System - For system-level software
- Using Containers - For container-based applications
- Building from Source - For packages requiring compilation